> Please Install and activate the LiteSpeed Cache plugin by LiteSpeed Technologies
> After installing it Now the plugin is installed we need to set up the QUIC.cloud account
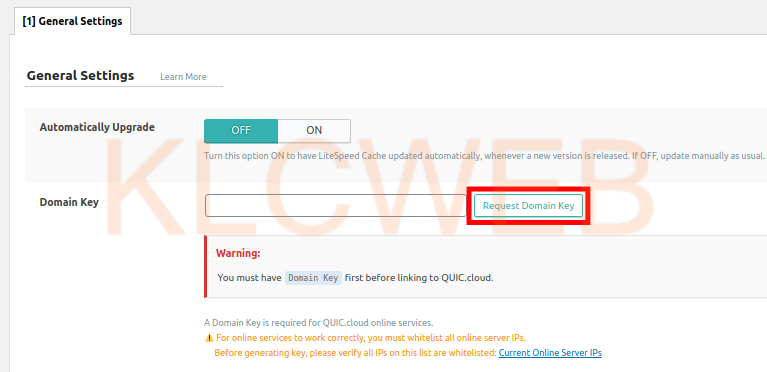
> Please click on the LiteSpeed Cache then General link from your navigation menu
> Please click the Request Domain Key button on the General Settings page
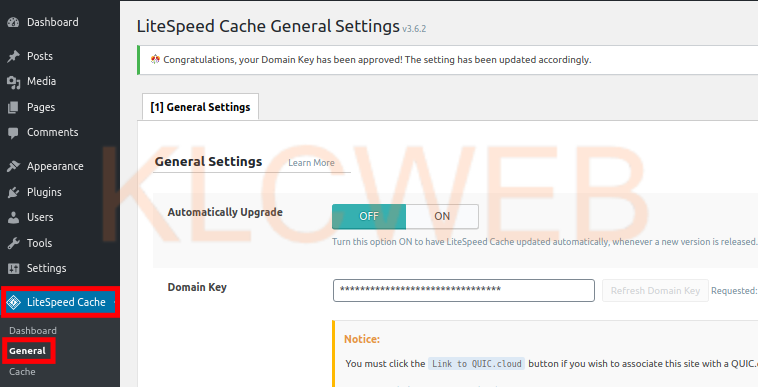
> AFter your domain key has been requested, it will take some time to be added to your WordPress site.
> After few minutes, Please click on the General link under LiteSpeed Cache to refresh the page.
> You will have this message “ Congratulations, your Domain Key has been approved! The setting has been updated accordingly.”
> Plesae click the Link to QUIC.cloud button from the right side of the page,
> Please login to your QUIC.cloud account.after you will be directed back to your WordPress Dashboard.
>Plesae enter your shared IP address in the Server IP field and then click the Save Changes button.